Welcome to our Advisors Circle, where today we're joined by Lisa, who has brought along some delightful creations including her Weekend Getaway Blouse with Hemstitching, Chai Tee Dress and Tunic, and Heirloom Afternoon Tea Blouse Tutorial. She’s returned to share her latest sewing project with us. Thank you so much, Lisa, for taking the time to show off your tutorial!
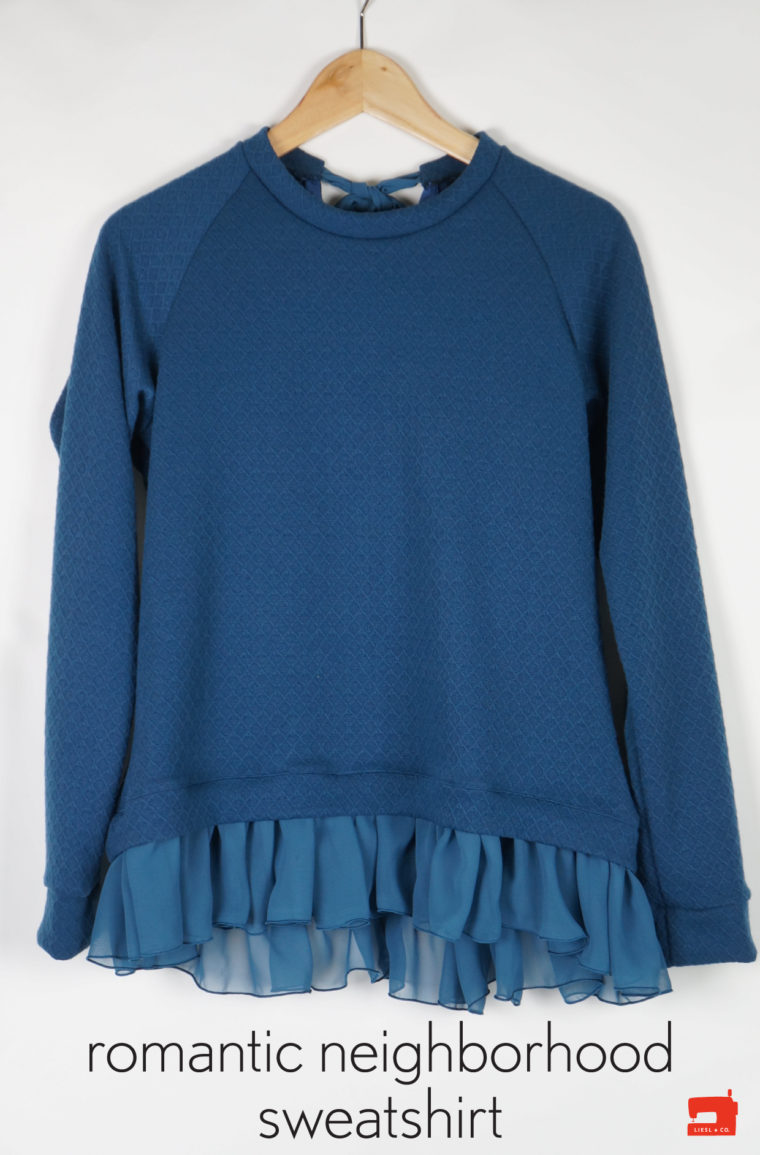
Patterns like the Liesl + Co. Neighborhood Sweatshirt are what I call "Great Wardrobe Builders." The multiple style variations give endless possibilities. We've already seen some fantastic versions with contrasting fabrics, lace sleeves, and even faux suede finishes. For my take on this pattern, I wanted something romantic for my daughter, so I added a chiffon ruffle and a back bow detail.
I used the View B body paired with the View A sleeve. The fabric I chose was a lightweight sweatshirt knit. The ribbon and bow required about half a yard of 45-inch-wide chiffon. To tailor it to fit better, I shortened the pattern body by an inch at the lengthen/shorten line and also reduced the waistband width by an inch to accommodate the ruffle. At the center back of the pattern, I cut a "V" shape that was four inches deep and one inch wide.
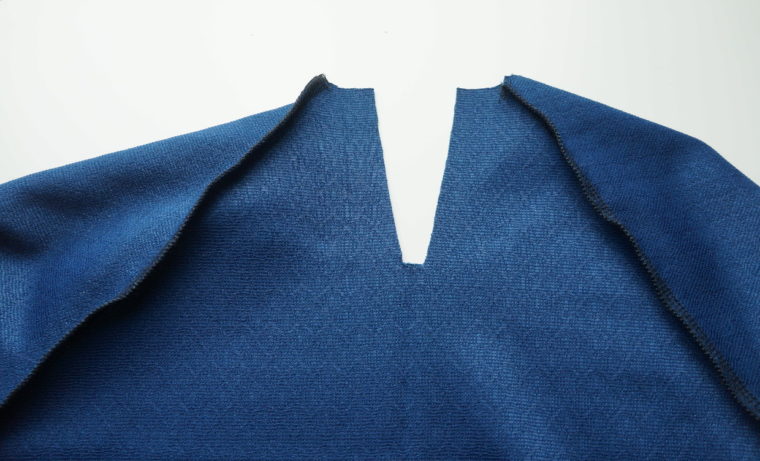
I rounded the bottom of the "V" slightly to allow space for the bow's knot. I also trimmed the neckband by an inch. To finish the "V" opening, you can use bias binding or a strip of lightweight jersey fabric. Press open one side of the bias binding and pin it to the right side of the back with the raw edges aligned, stretching the "V" open and extending the binding on either end.
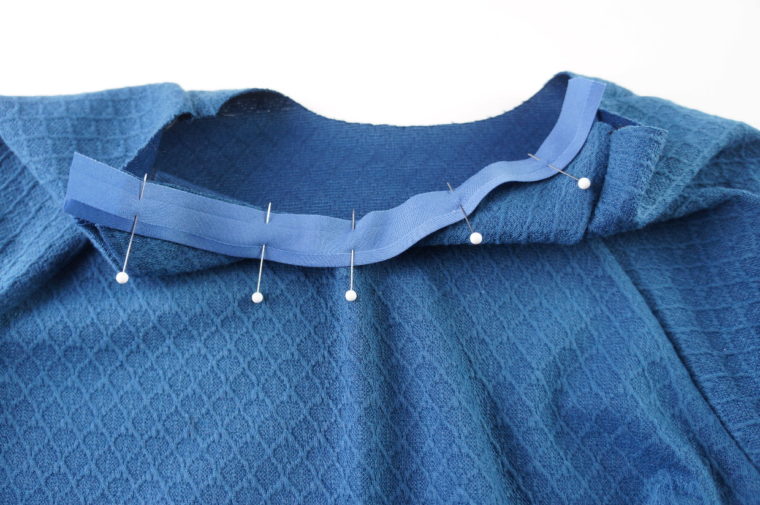
Sew the pieces together using the pressed-open line as your guide. Turn the bias to the wrong side and secure it with pins.
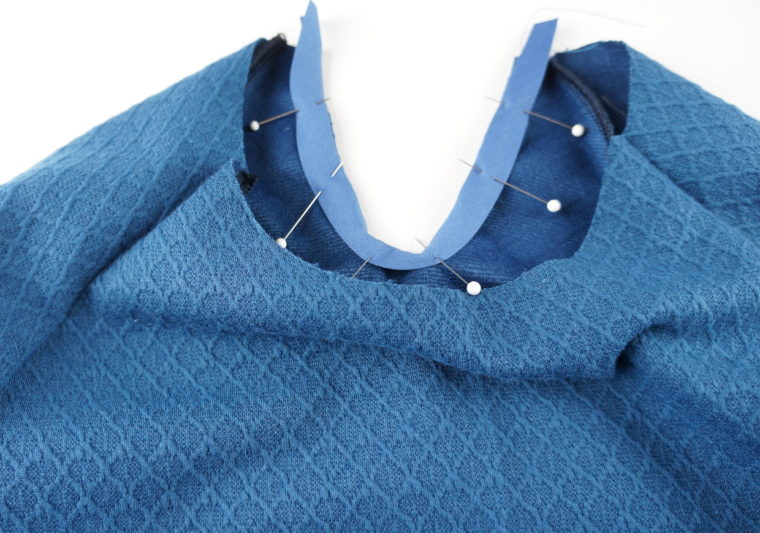
Stitch close to the edge of the bias. Trim the excess bias edges level with the top of the sweatshirt.
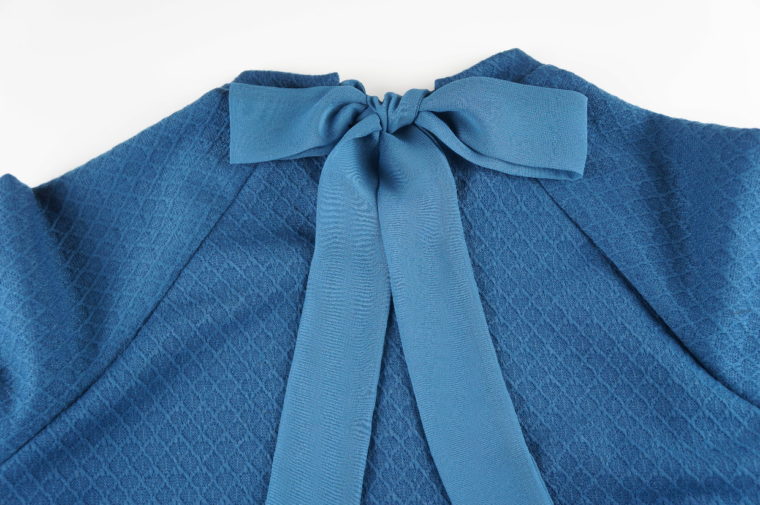
To create the bow, cut two strips of chiffon measuring three inches wide and the full width of the fabric (45 inches). Follow this post for some useful tips on working with chiffon. Sew one short end together with right sides facing, then do the same with the long sides. Turn the strips right side out. Repeat this process for both strips. I used my serger, which worked beautifully with the chiffon. Alternatively, you could opt for French seams. Pin the short raw edge of each tie to the bottom part of the neckband but keep them out of the bottom seam allowance.
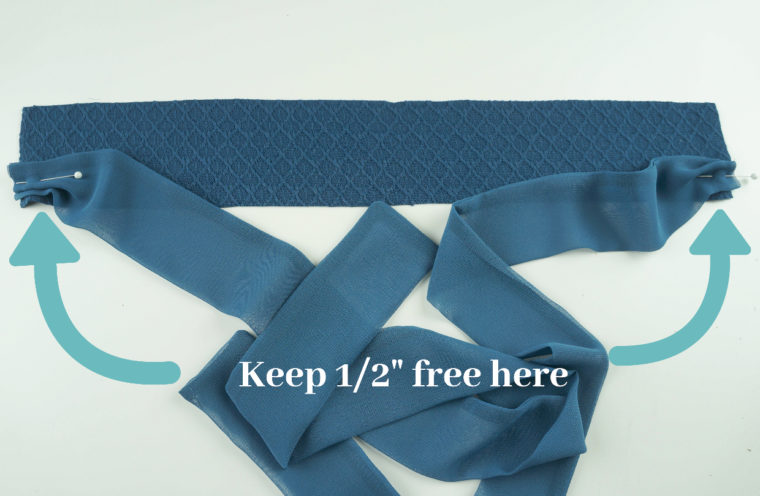
Fold the ties into pleats to fit within the bottom half of the neckband and baste them in place. Fold the neckband in half with the long sides together and sew the short ends together. Turn it right side out. Attach the neckband to the neckline of the sweatshirt with the raw edges aligned, starting and finishing at the "V," ensuring the bow ties remain untouched. Press the neckband toward the wrong side as directed by the pattern and topstitch if desired.
For the ruffle, cut three strips of chiffon six inches wide and the full width of the fabric. Join the strips together at the short ends with right sides facing to form one continuous long strip. Finish the bottom edge of the chiffon using the rolled hem setting on your serger.
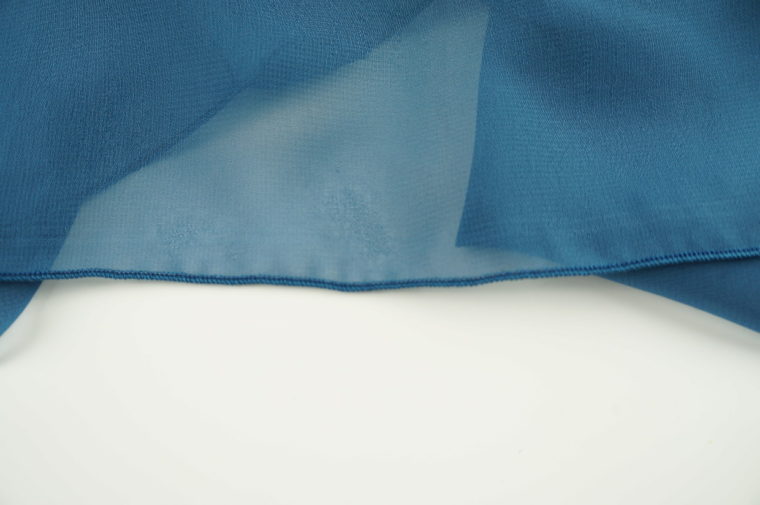
Finish the top edge to prevent fraying. Gather the top edge using your preferred method. Sew the remaining short ends together to form a loop and adjust the gathers until the top edge matches the finished waist seam of the sweatshirt. Sew the ruffle to the seam connecting the sweatshirt body and the waistband.
For a slightly different look, you might want to consider adding a tulle ruffle to your Neighborhood Sweatshirt. Check out our Tulle Hem Tutorial for inspiration.
(adsbygoogle = window.adsbygoogle || []).push({}); Â
--- I hope this meets your requirements! Let me know if any further adjustments are needed.
Polyester Brush Yarn,Space Dyed Yarn,Polyester Space Dyed Yarn,Polyester Dyed Yarn
ZHANGJIAGANG WELLHOW TRADING CO., LTD. , https://www.wellhowyarn.com